


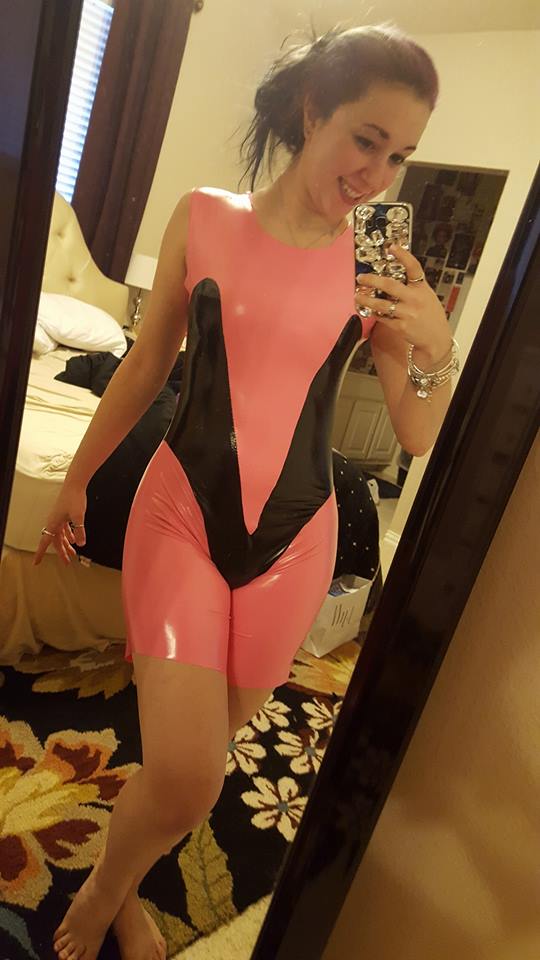
Rain Mikamura from G Gundam
A-Kon 2016
Photos by Tobious Photography
Making Rain's mobile trace unit suit has been a dream of mine since I first saw G Gundam back in 2002/2003ish. In the last few years, I kept going back to the idea of doing it and finally I decided that 2016 would be my year! This costume is a good example of putting in planning, material research, and sewing technique.
MATERIALS
STRETCH PVC FABRIC
I used pink four-way stretch PVC fabric for the torso with the idea of mobility in mind. I purchased mine from Spandex House and was very happy with the quality. I bought three yards which was entirely too much, but I thought I might like to have extra in case I messed up or wanted to experiment. I could have gotten away with one yard, but better safe than sorry. The black fabric I used is a two-way stretch PVC that I had lying around with a slight texture to it. I would have chosen to get four-way stretch fabric if I hadn't already had this fabric in my drawer. The PVC has a fabric backing to it, so I did not use any kind of lining.
MISC SUPPLIES
- 5" styrofoam ball
- Craft foam
- Worbla (Yaya Han's store)
- Heat gun and hot glue gun
- Hot glue, wood glue, gesso, E6000
- Wax paper and aluminum foil
- Rare earth magnets and Velcro
PROCESS
I chose to start with the boots and gloves first because those were things that I've done before and knew I could get through easily. I bought a pair of black heels with a slightly chunky 4" heel. The chunkier the heel, the more comfortable the shoe will be, so I always try to avoid anything skinny that I know will destroy my feet.
Sarcasm-Hime's boot cover tutorial is one I often reference when I make costumes. The only difference is that instead of a front and back seam, my boots only have a back seam, which was a little tricky. I had to stretch the fabric around my leg and pin it in the back, which would have been helpful if there was a second person to help. WITH PVC, ANY PIN MARK YOU MAKE WILL BE THERE FOREVER. PVC is a plastic and therefore unforgiving when it comes to mark making. Just be careful where you put your pins. I thought about using regular spandex and creating a mock up, but decided to just go for the gold and use the final fabric. Do what's best for you. Make sure your fabric isn't bunching up in the back! Any bunching or puckers or accidental folds will show up big time. I actually had to make three boots in total because the first one was a bunchy mess because I didn't lay the fabric perfectly flat while I was repinning it on the floor. Something I found helpful was to pin the fabric on my leg, then slip out of the fabric and lay it flat on the floor, making sure my front (where the a front seam would be) was flat and repinned the fabric.
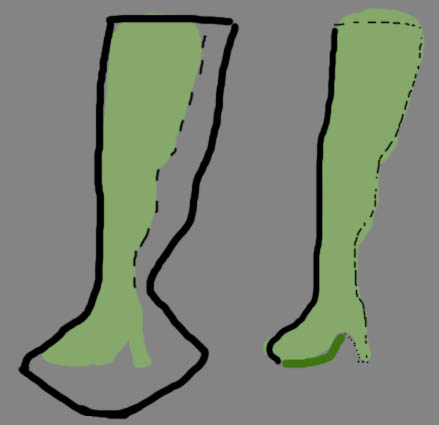
I had to leave a weird, big chunk of fabric at the bottom that would go around the foot part of the boot. To make them fit the best for me, I ran my back seam down my leg all the way to the heel, under the heel, and back up the inside of the heel to encase the heel completely. After that, it was a matter of stretching the foot fabric to the underside of the shoe and pinning and gluing the fabric. PVC generally doesn't like hot glue, so I used a mix of hot glue and E6000 to make sure I got a strong bond. The hot glue essentially just held the fabric to the shoe while the E6000 dried. The boots would eventually be sewn directly onto the body suit, so I didn't bother finishing the tops.
Maybe a sloppy Photoshop drawing will help better explain this. That's kind of the big chunky blob shape I was talking about down on the foot area. As far as the first leg goes, the dashed line represents the pins and the bold line represents the general shape. For leg #2, the bold line shows where the fabric is folded (I chose not to do a front seam), the dashes show where I sewed, and the dark green shows the area that's been glued to the shoe. It's not fun or clean, but at least it's on the bottom of the shoe and no one needs to see it!
Gloves will forever be the bane of my existence. I used the turkey hand method and had to make four gloves in total because, while stretch PVC stretches, it can only stretch so much and I kept making the wrists and pinkies too narrow, which kept me from getting my hand in. Sewing around the fingers takes time and patience. Again, be careful with your sewing because if you have to seam rip to let out fabric, the needle marks will be forever left in the fabric. Cut big, then tailor in to fit you better. I used a medium length straight stitch for the entire costume. I originally was going to have the gloves be separate and held on by Velcro, but in the end I decided to just sew them onto the suit because I couldn't really see myself slithering in and out of armpit length gloves too often.
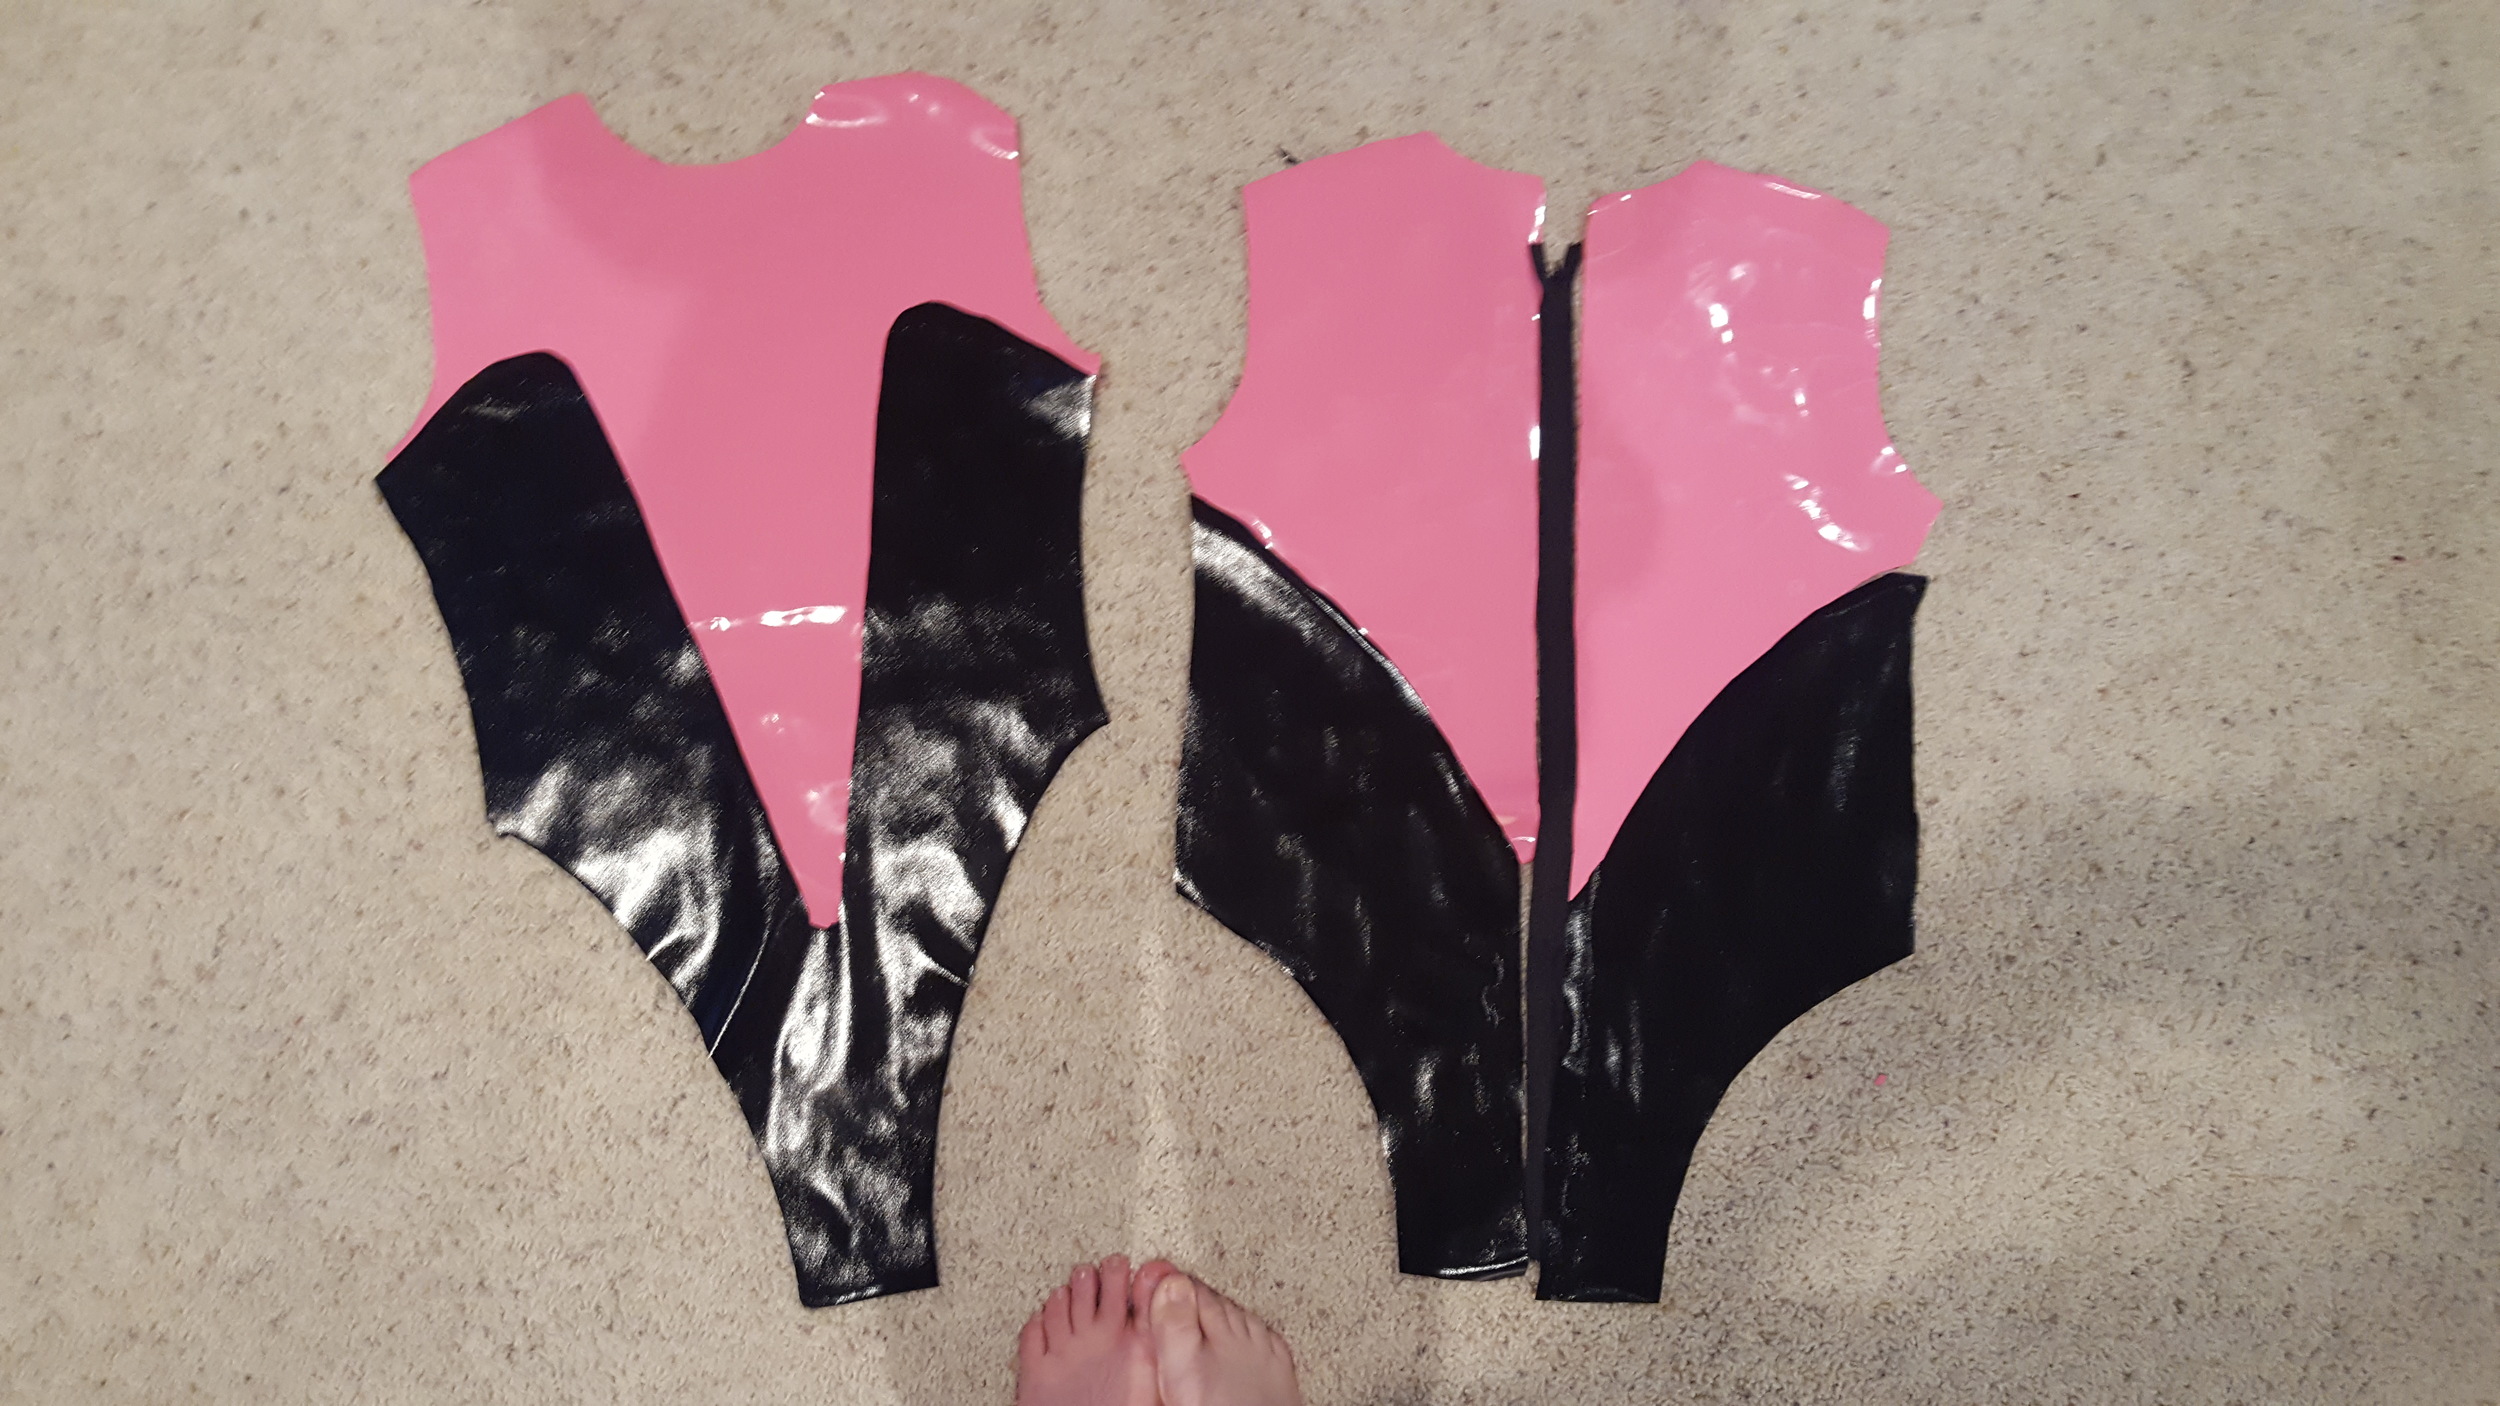
Onto the most headachey part: the main part of the suit! I had an experienced pattern making friend come over and help me tackle the main body. This pattern required no special tailoring and no contouring seams (Things like darts and princess seams), so it was easy to draw out flat on the ground. The man body was "four" pieces: Pink front, black front, pink back (Two of them) and black back (two of them). The four back panels eventually turned into two final panels, but let's focus on the front. The bottom of the front black panel should reach all the way down and back to your deep crotch, so make sure you measure from there to your sternum to get an accurate shape. I wanted the V seam between the pink and black to hit right at my belly button, so I used that as a point of reference. Don't cut the neckline too deep just yet.
Just to give a reference on the horizontal stretch,
- my high bust measurement is 32.5", but the high bust measurement on the costume is 28"
- my waist measurement is 27", but the waist on the costume is 25"
To get the arm holes and shoulder measurements, just measure yourself like you would for any other costume. These parts don't really stretch much. If you don't already have a handy chart with all of your measurements on it, it's a nice thing to have around!
The trickiest part was making sure the front and back black panels lined up perfectly, but really all it required was a little bit of extra math and careful cutting. Be careful about where the front black panel hits over your hips. As far as the back panels go, it's a matter of turning the four pieces into two panels and installing the zipper. I used a 22" invisible zipper to make sure that I didn't pop any seams trying to get into the costume (big hip/butt problems). Assuming you've sewn up the side seams and shoulder seams, you should now have something that resembles a crotchless swimsuit!
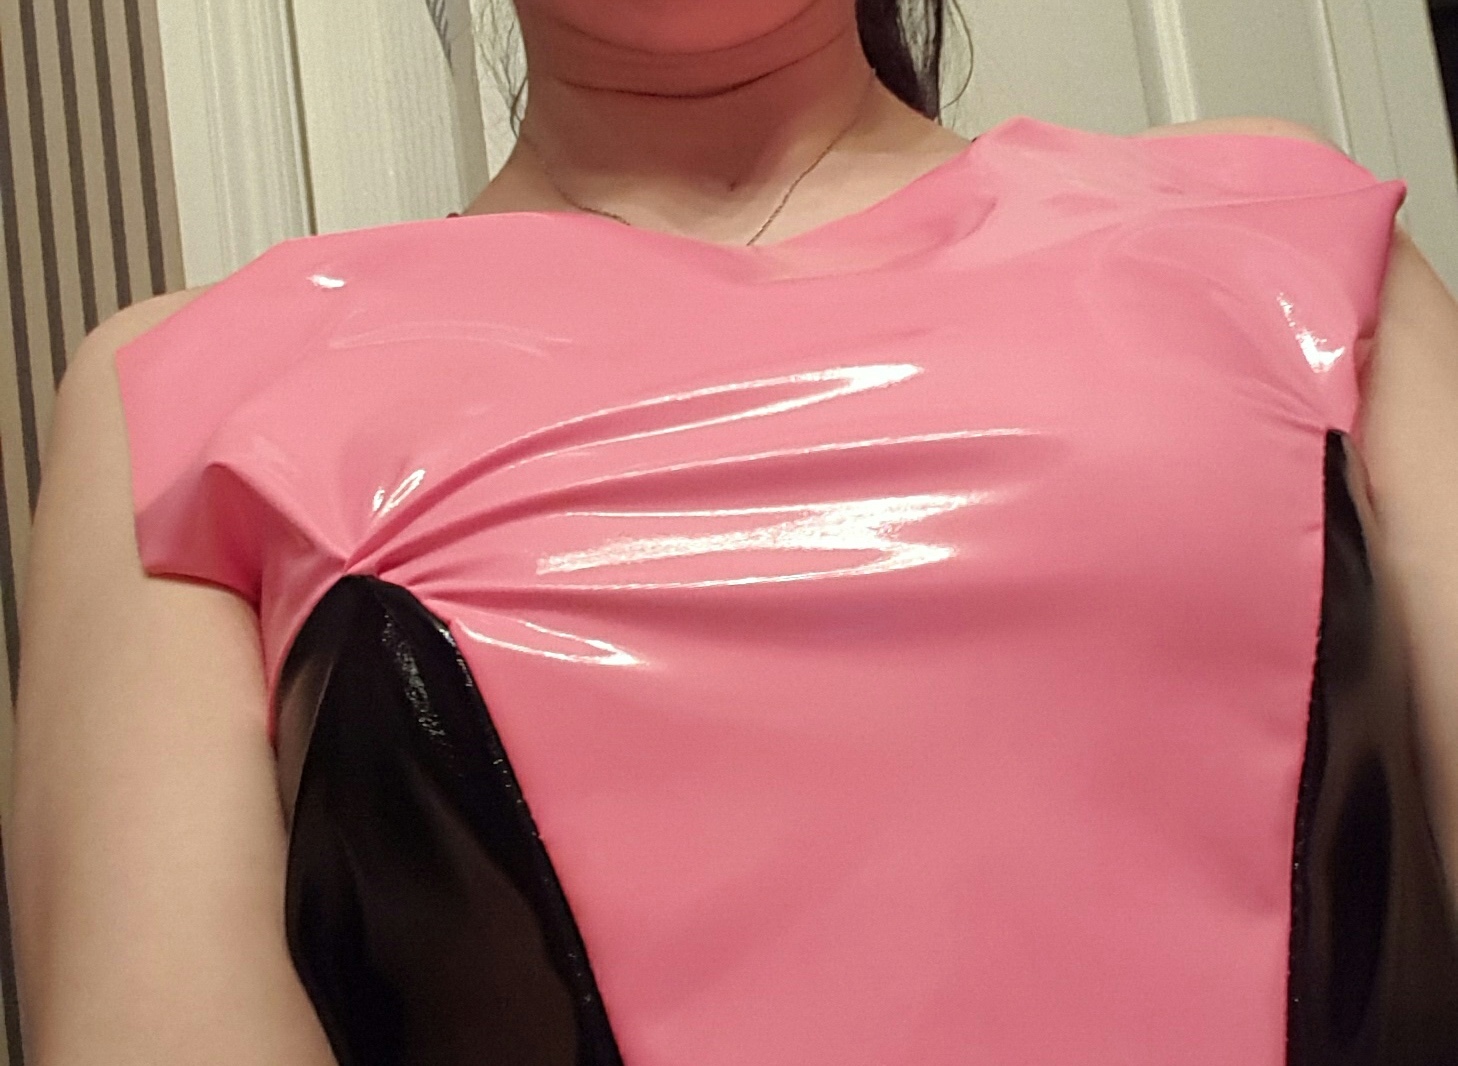
If you notice below, the first time I sewed the top, I wasn't paying close enough attention to the curve of the boob part and had some BAD puckering. I ripped the seam out and since it's PVC, you can see the needle marks, but it's really not that noticeable because of the slight bumpy texture that the black fabric has. In the second photo, I didn't have the zipper in yet, so it was loosely held up with my arms and looked good! By the time I got to the third photo, the tension of everything pulling in all directions caused the boob parts to migrate outwards and I lost a little bit of waist definition. Look at the difference between the boob pieces lying on the floor and how they translate to a real body! It's nuts!
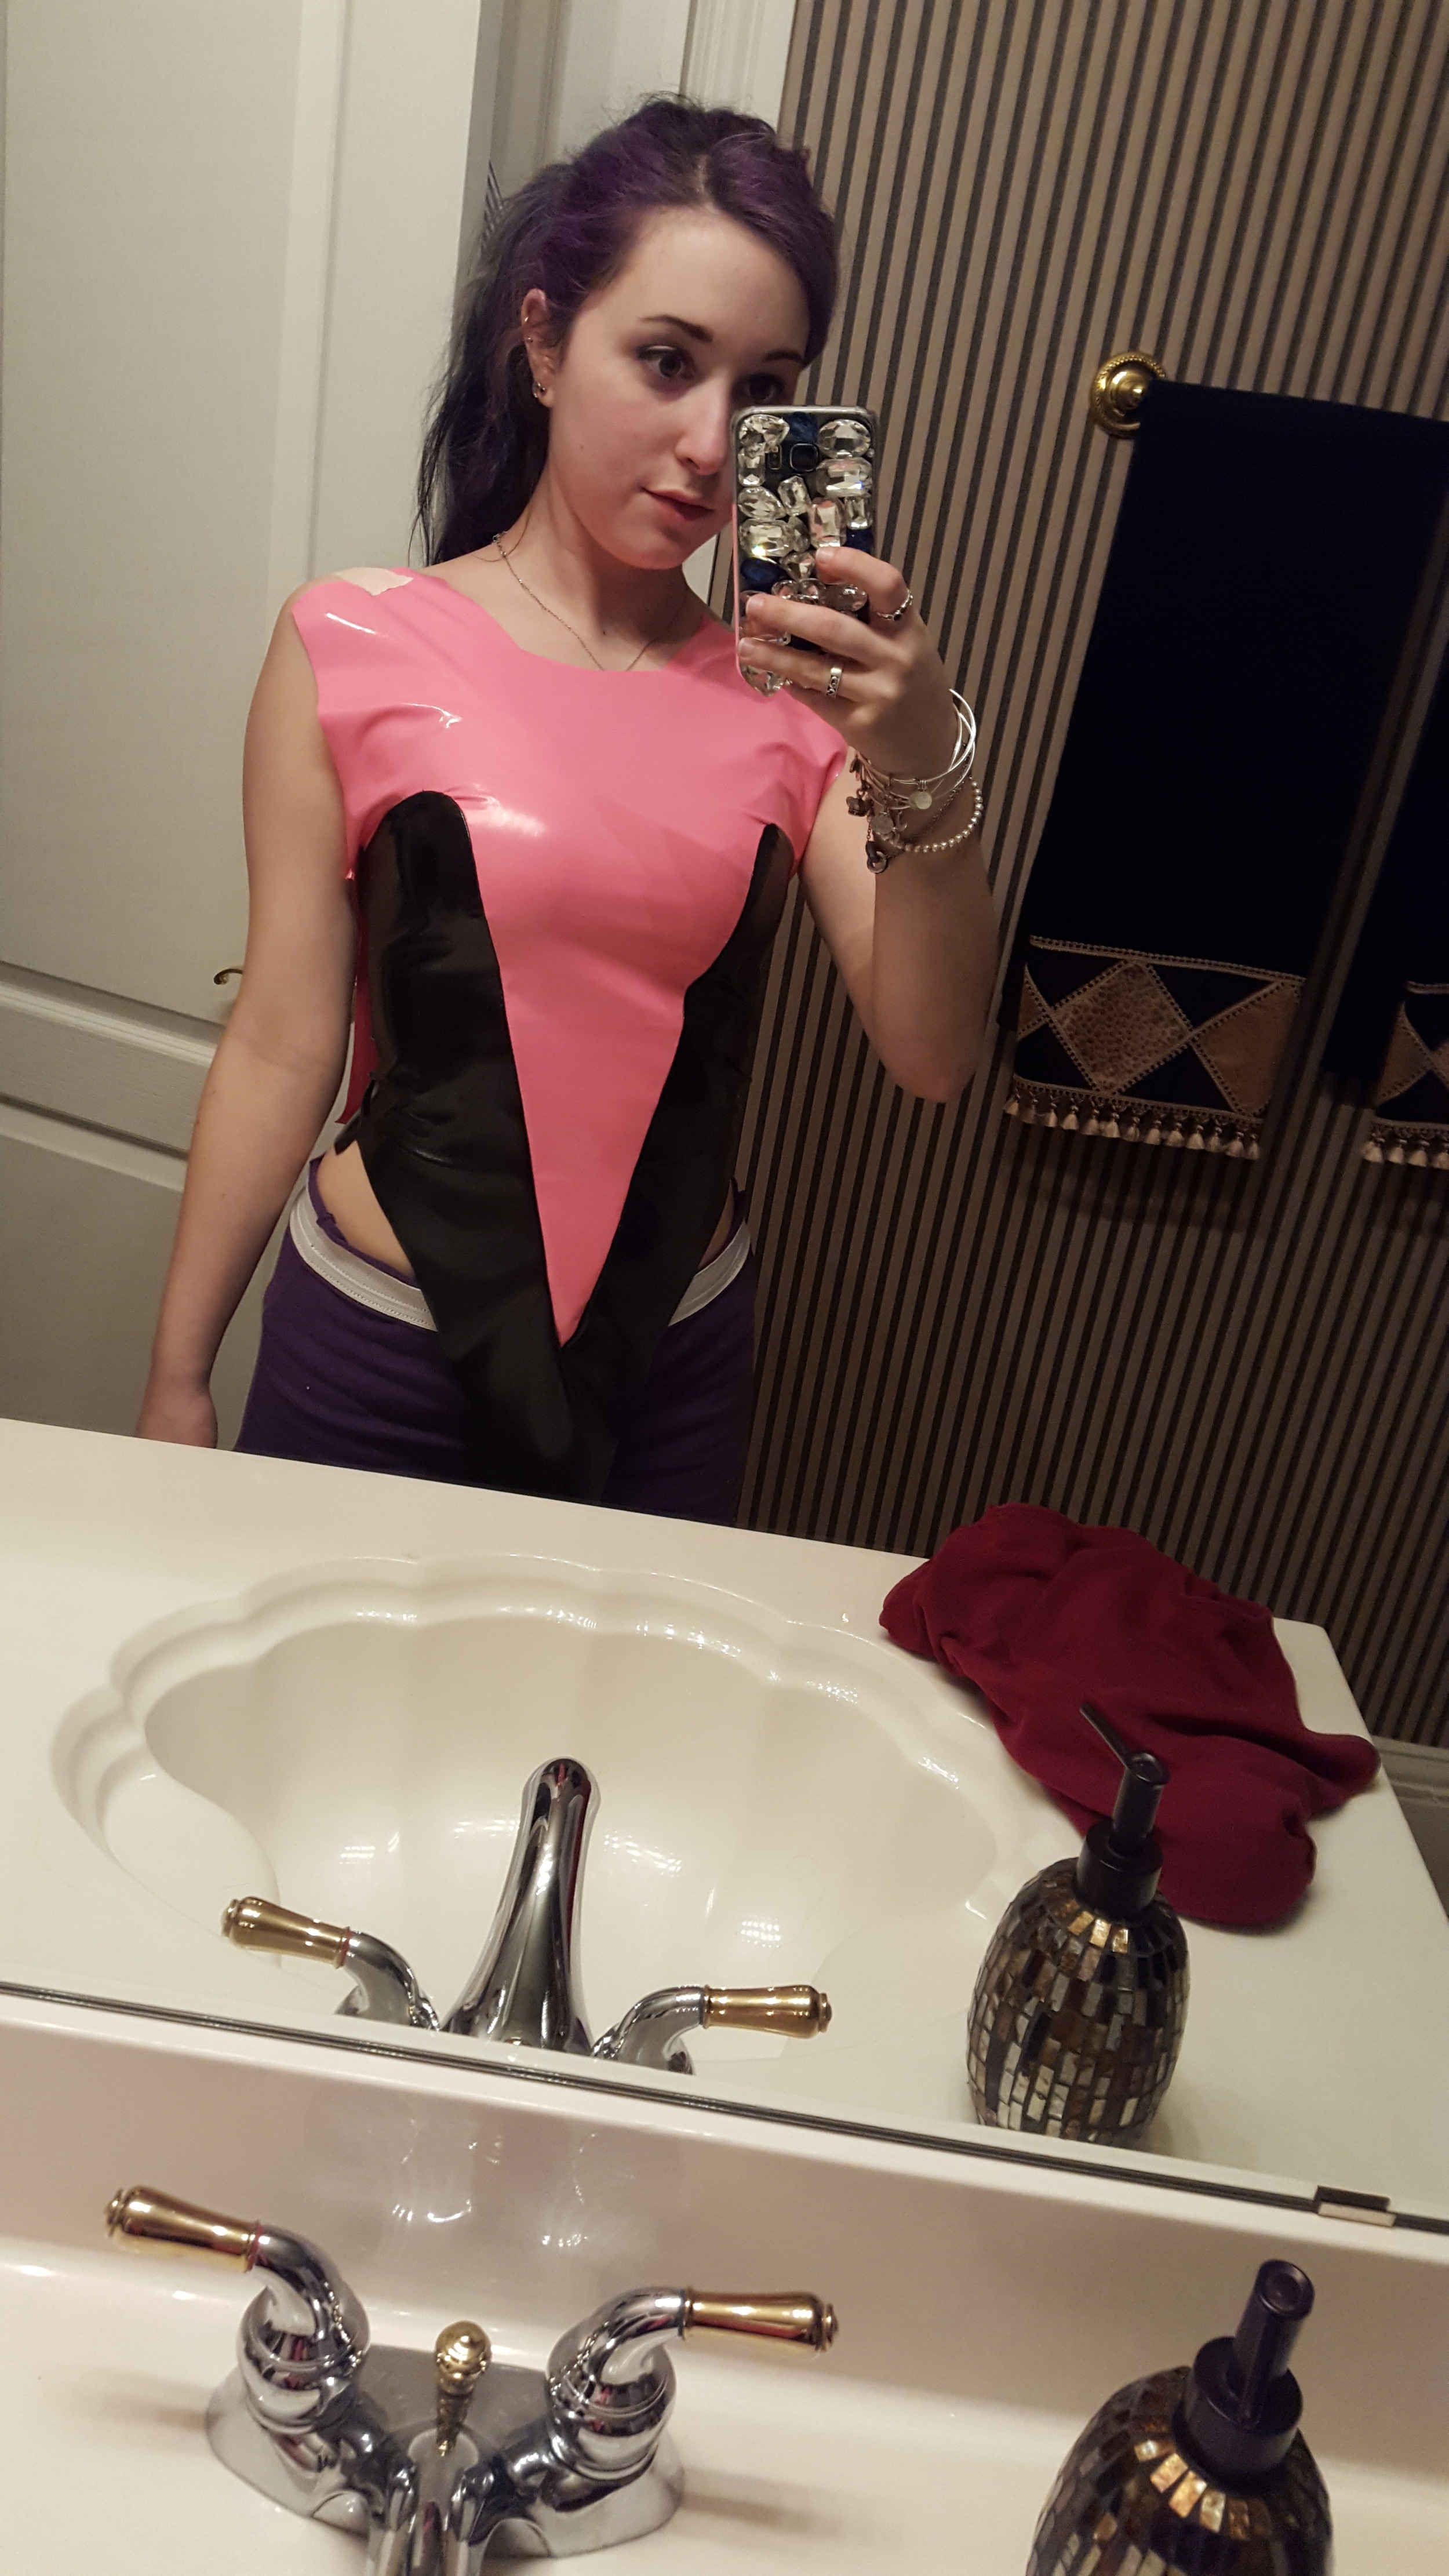
At this point, the black makes up your leg holes until the pink fabric goes in later to make up your actual leg holes. You want a nice, high opening, otherwise you'll visually look wider. Try to make this seam hit right above your hip. I measured the distance between my hip and my armpit to know exactly where the panel would hit above my hip. Once I was happy with this line, I went to sew the crotch up, but realized that I didn't have enough fabric in the back, so I ended up putting in an extra crotch panel to connect the back and the front. It's black, so you can barely see it. By now, you have a kind of swimsuit thing!
The leg and sleeve pieces are the exact same shape, just on different scales, and will resemble a regular sleeve pattern. Just measure around the openings and make sure your pieces will fit comfortably in there. Like with the boots, you want to minimize puckering, bunching, gathering, folds, pleats, and any other little mess ups. Keep things as flat and flush as possible to get a smooth, clean final look. At this point, you'll notice there's more tension in the costume and it's a little harder to move around in. Now it's time to sew on the gloves and boots! I did a top stitch around the boots after I sewed them on to reinforce the seam and to make it lie flat. And that's it! You now have a fully finished body suit!

As this is a stretch fabric, you want this to be form fitting and stretch comfortably around your body without being too tight or too loose. CUT BIG AND TAILOR DOWN when in doubt.
For any bodysuit, I like wearing a dancer's body tight underneath it. It helps smooth everything out and provides a protective layer between you and the fabric, plus it makes getting in and out of this so much easier, since the fabric on the wrong side of the PVC slides right against the body tight.
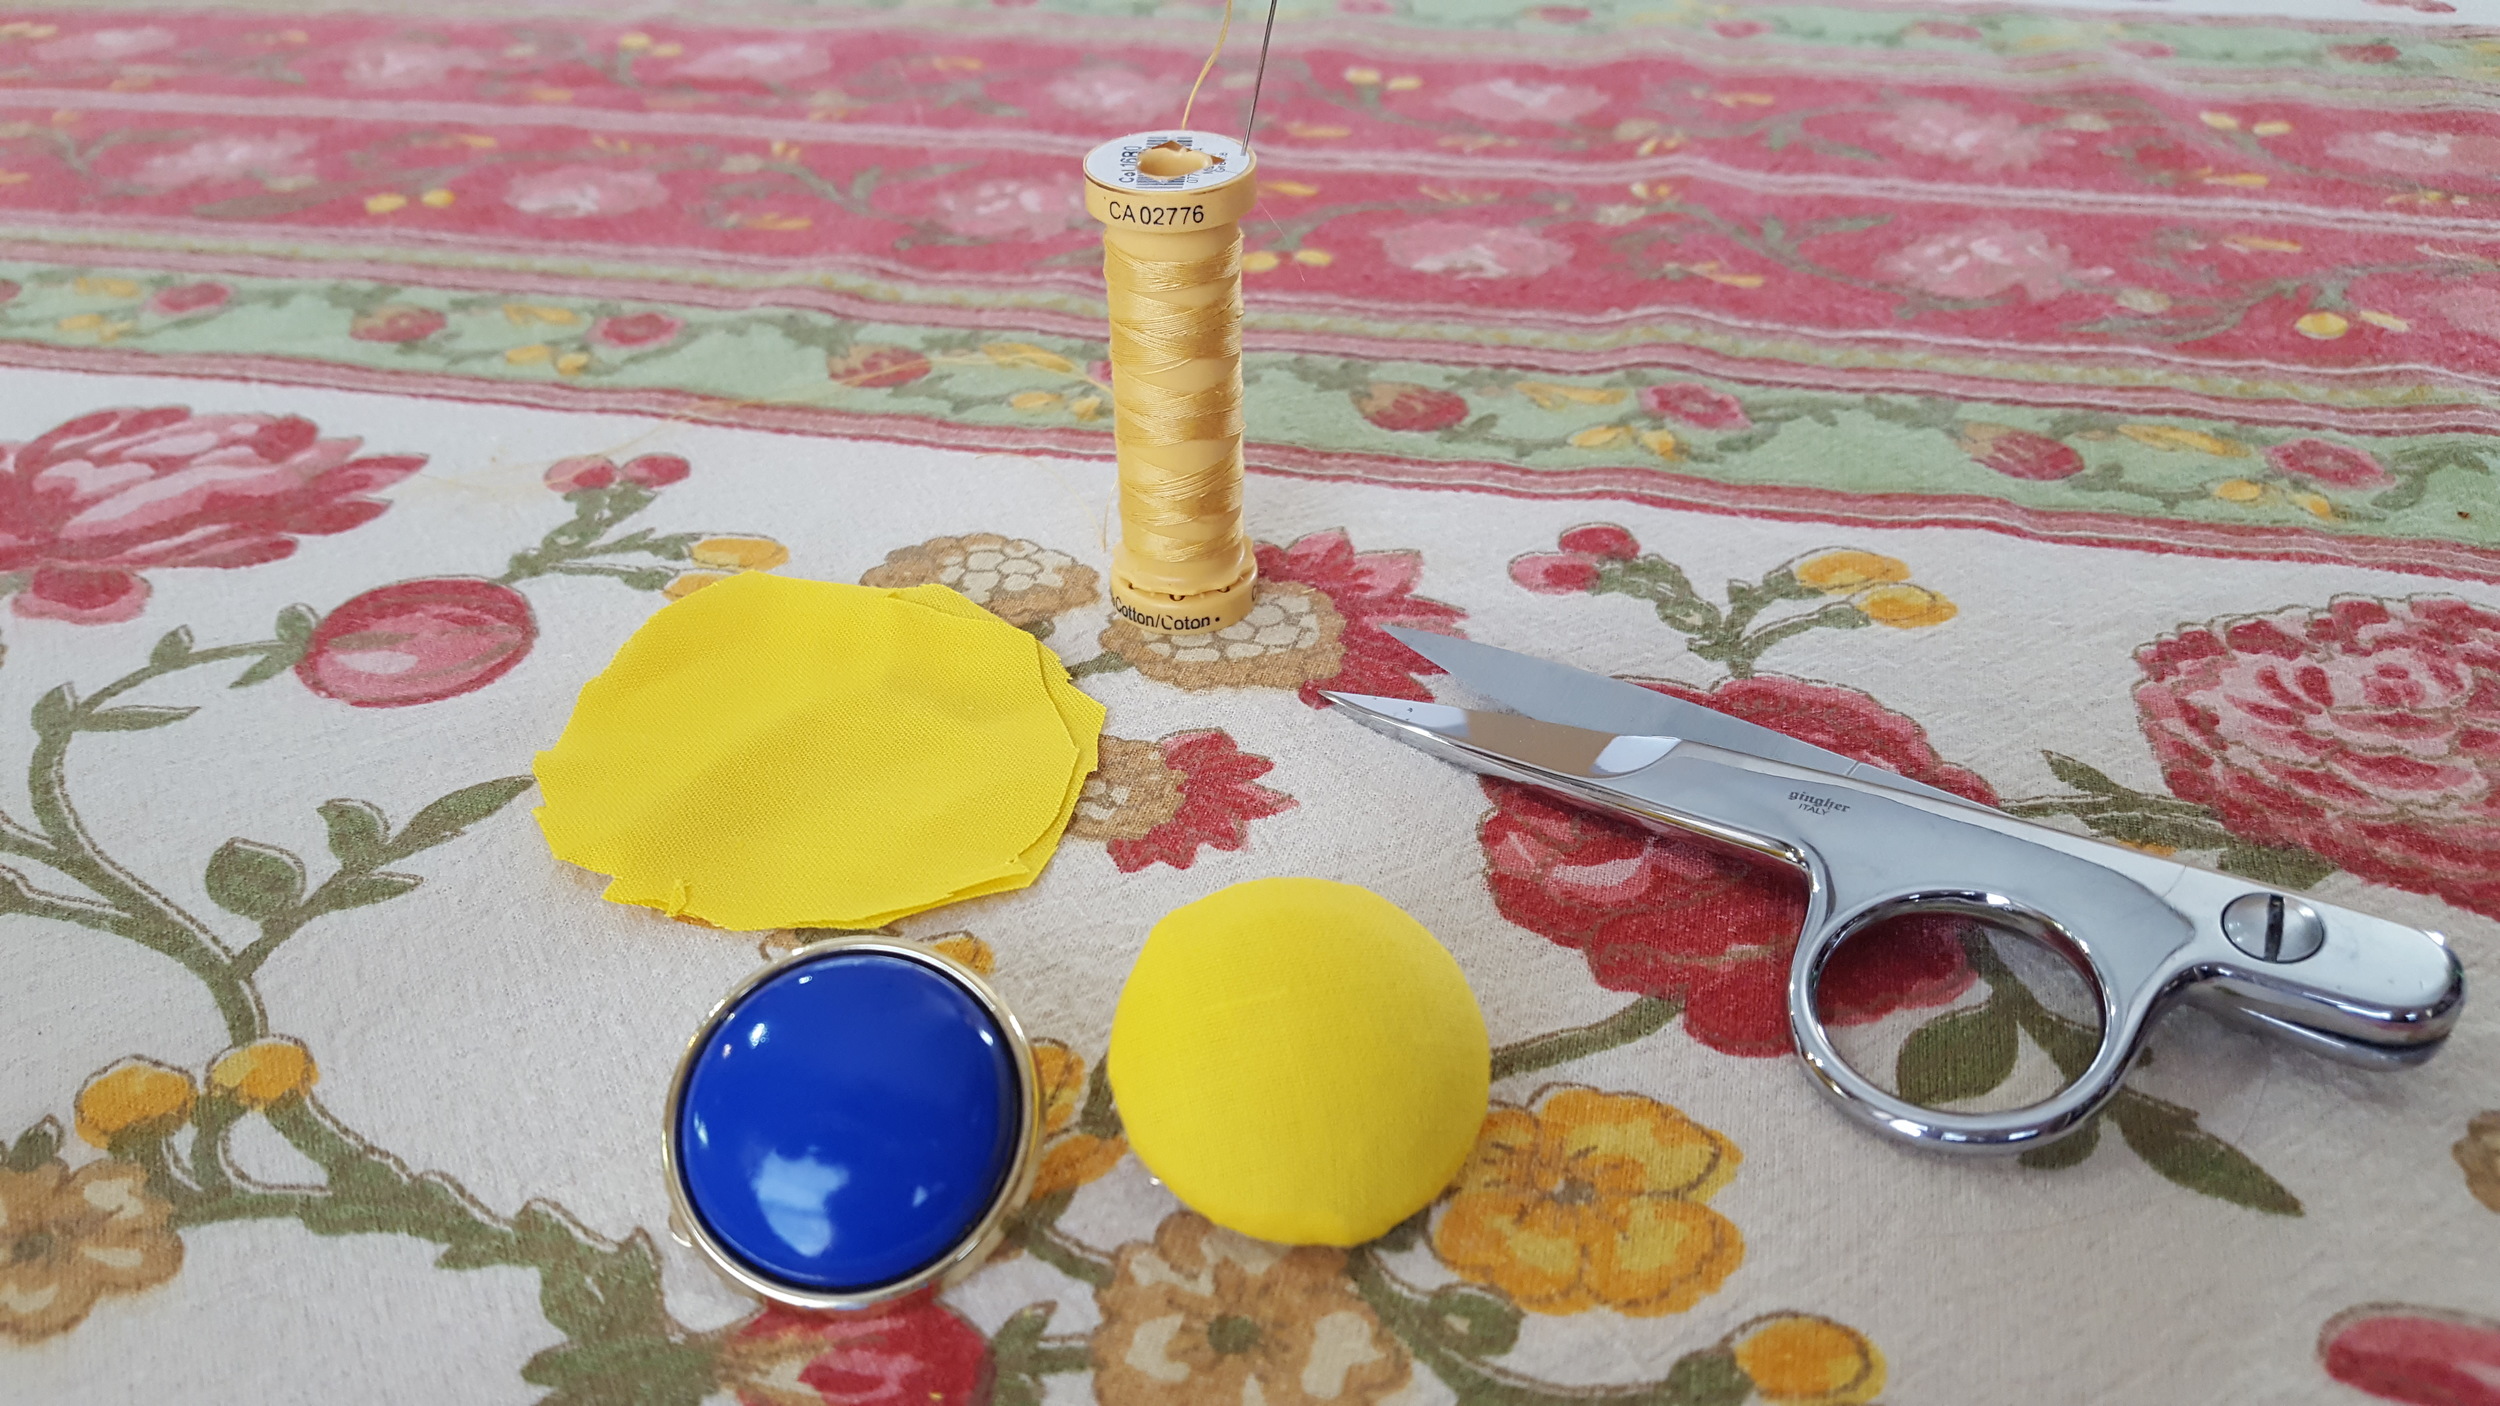
Now onto the accessories! I used Worbla for all of them. There wasn't much to it, just a bit of forming and sculpting. Because I foresaw myself sweating like a pig in this costume (You'll soon discover this during your test fittings), I wanted to make this costume as easy to wash as possible and minimize any non-washable accessories attached to the costume. My two ankle pieces attach to the costume via magnets! There is one on the underside of the node that will meet another magnet taped onto my ankle. Rare earth magnets are super strong and can be found at a hardware store (I shop at Home Depot). The wrist pieces just slip over my arm and hang out. Those were easy! For the earrings, I took some of my mom's giant old '80s earrings and sewed fabric around the back, like you would to make a fabric covered button.
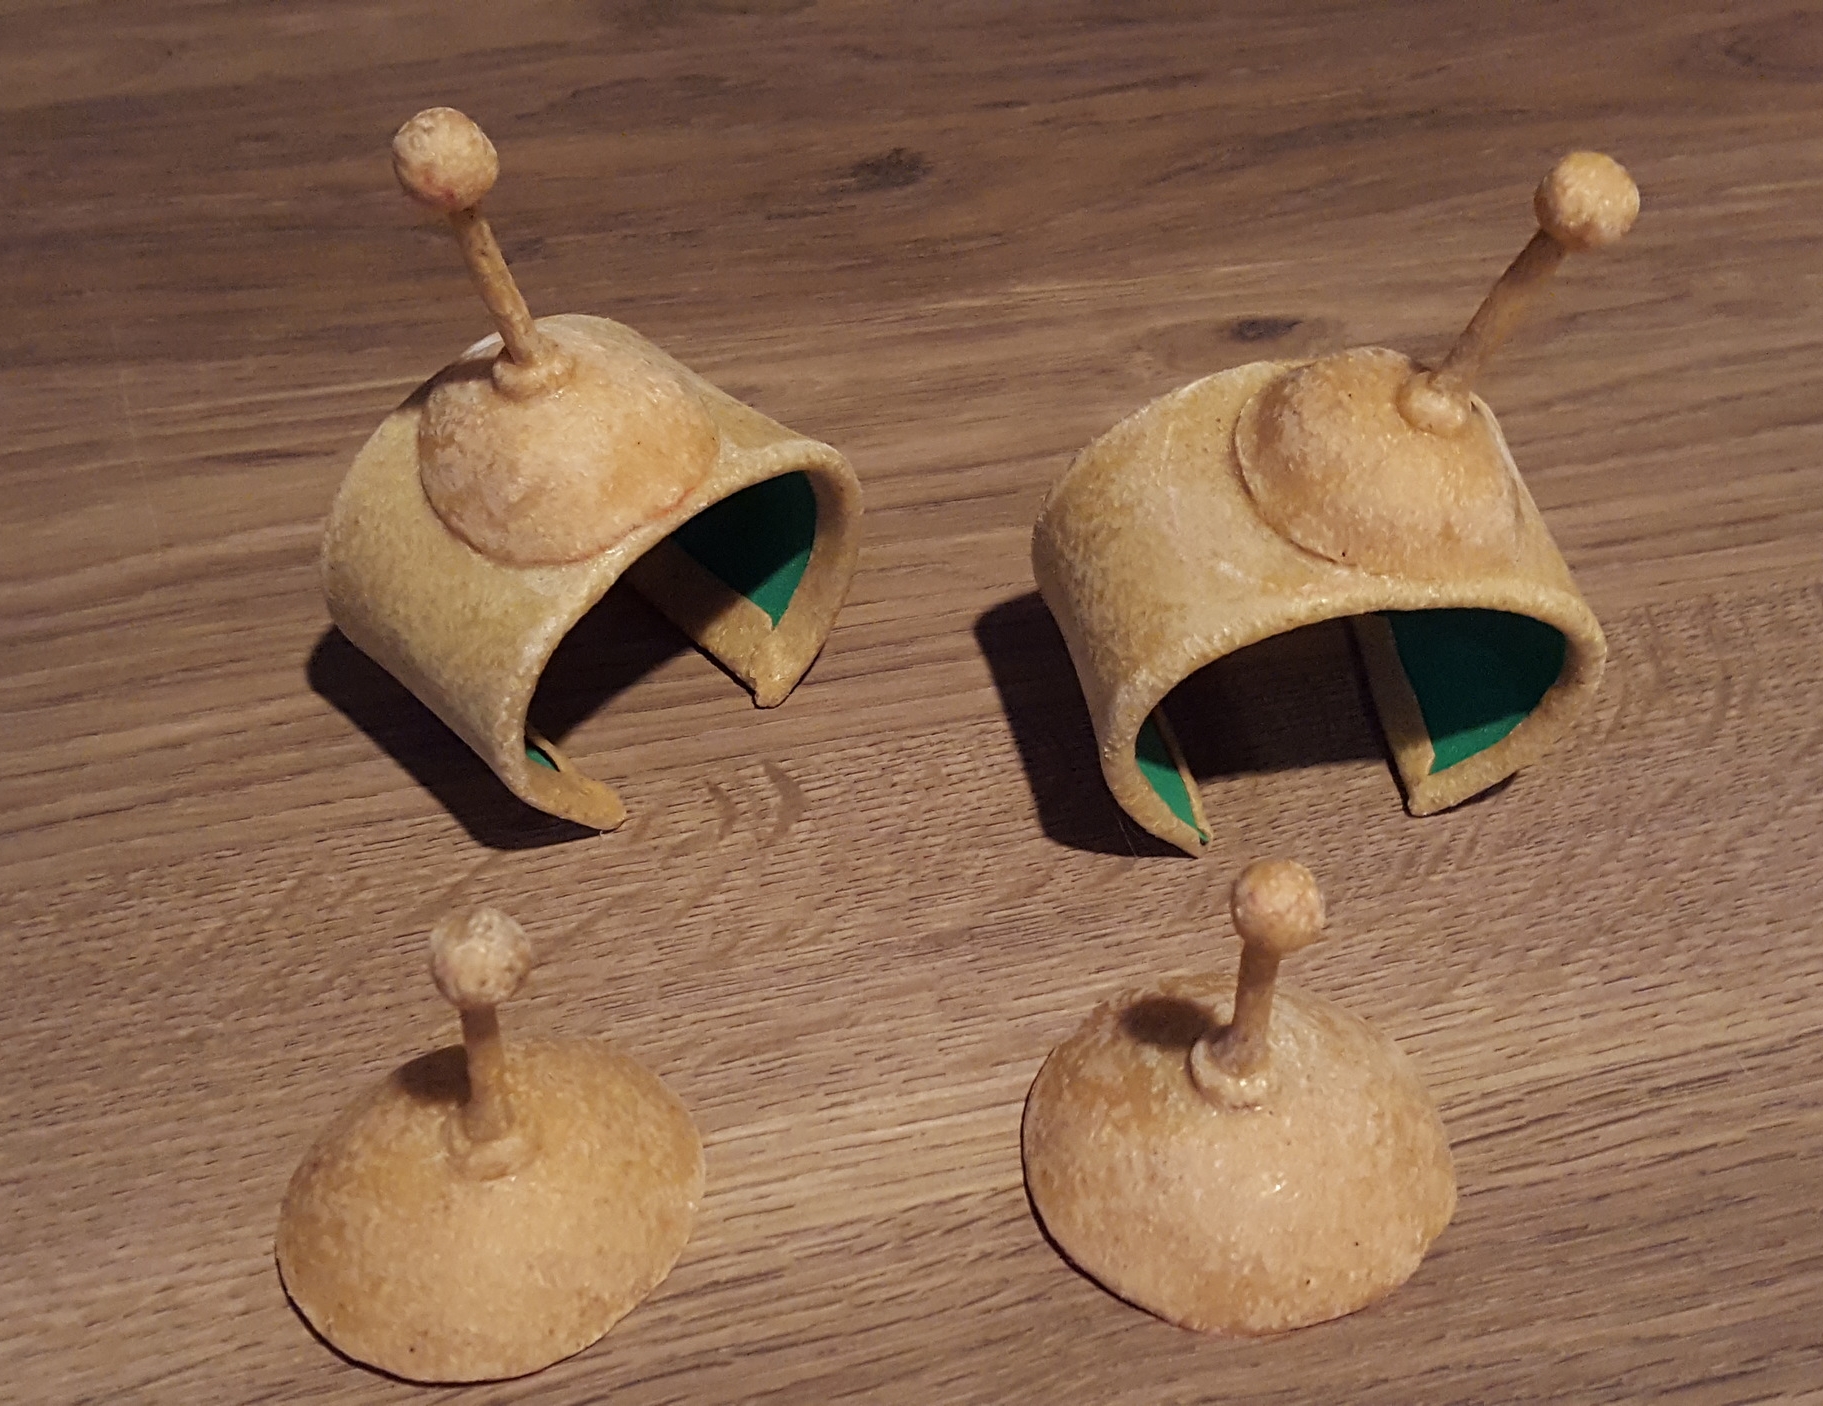
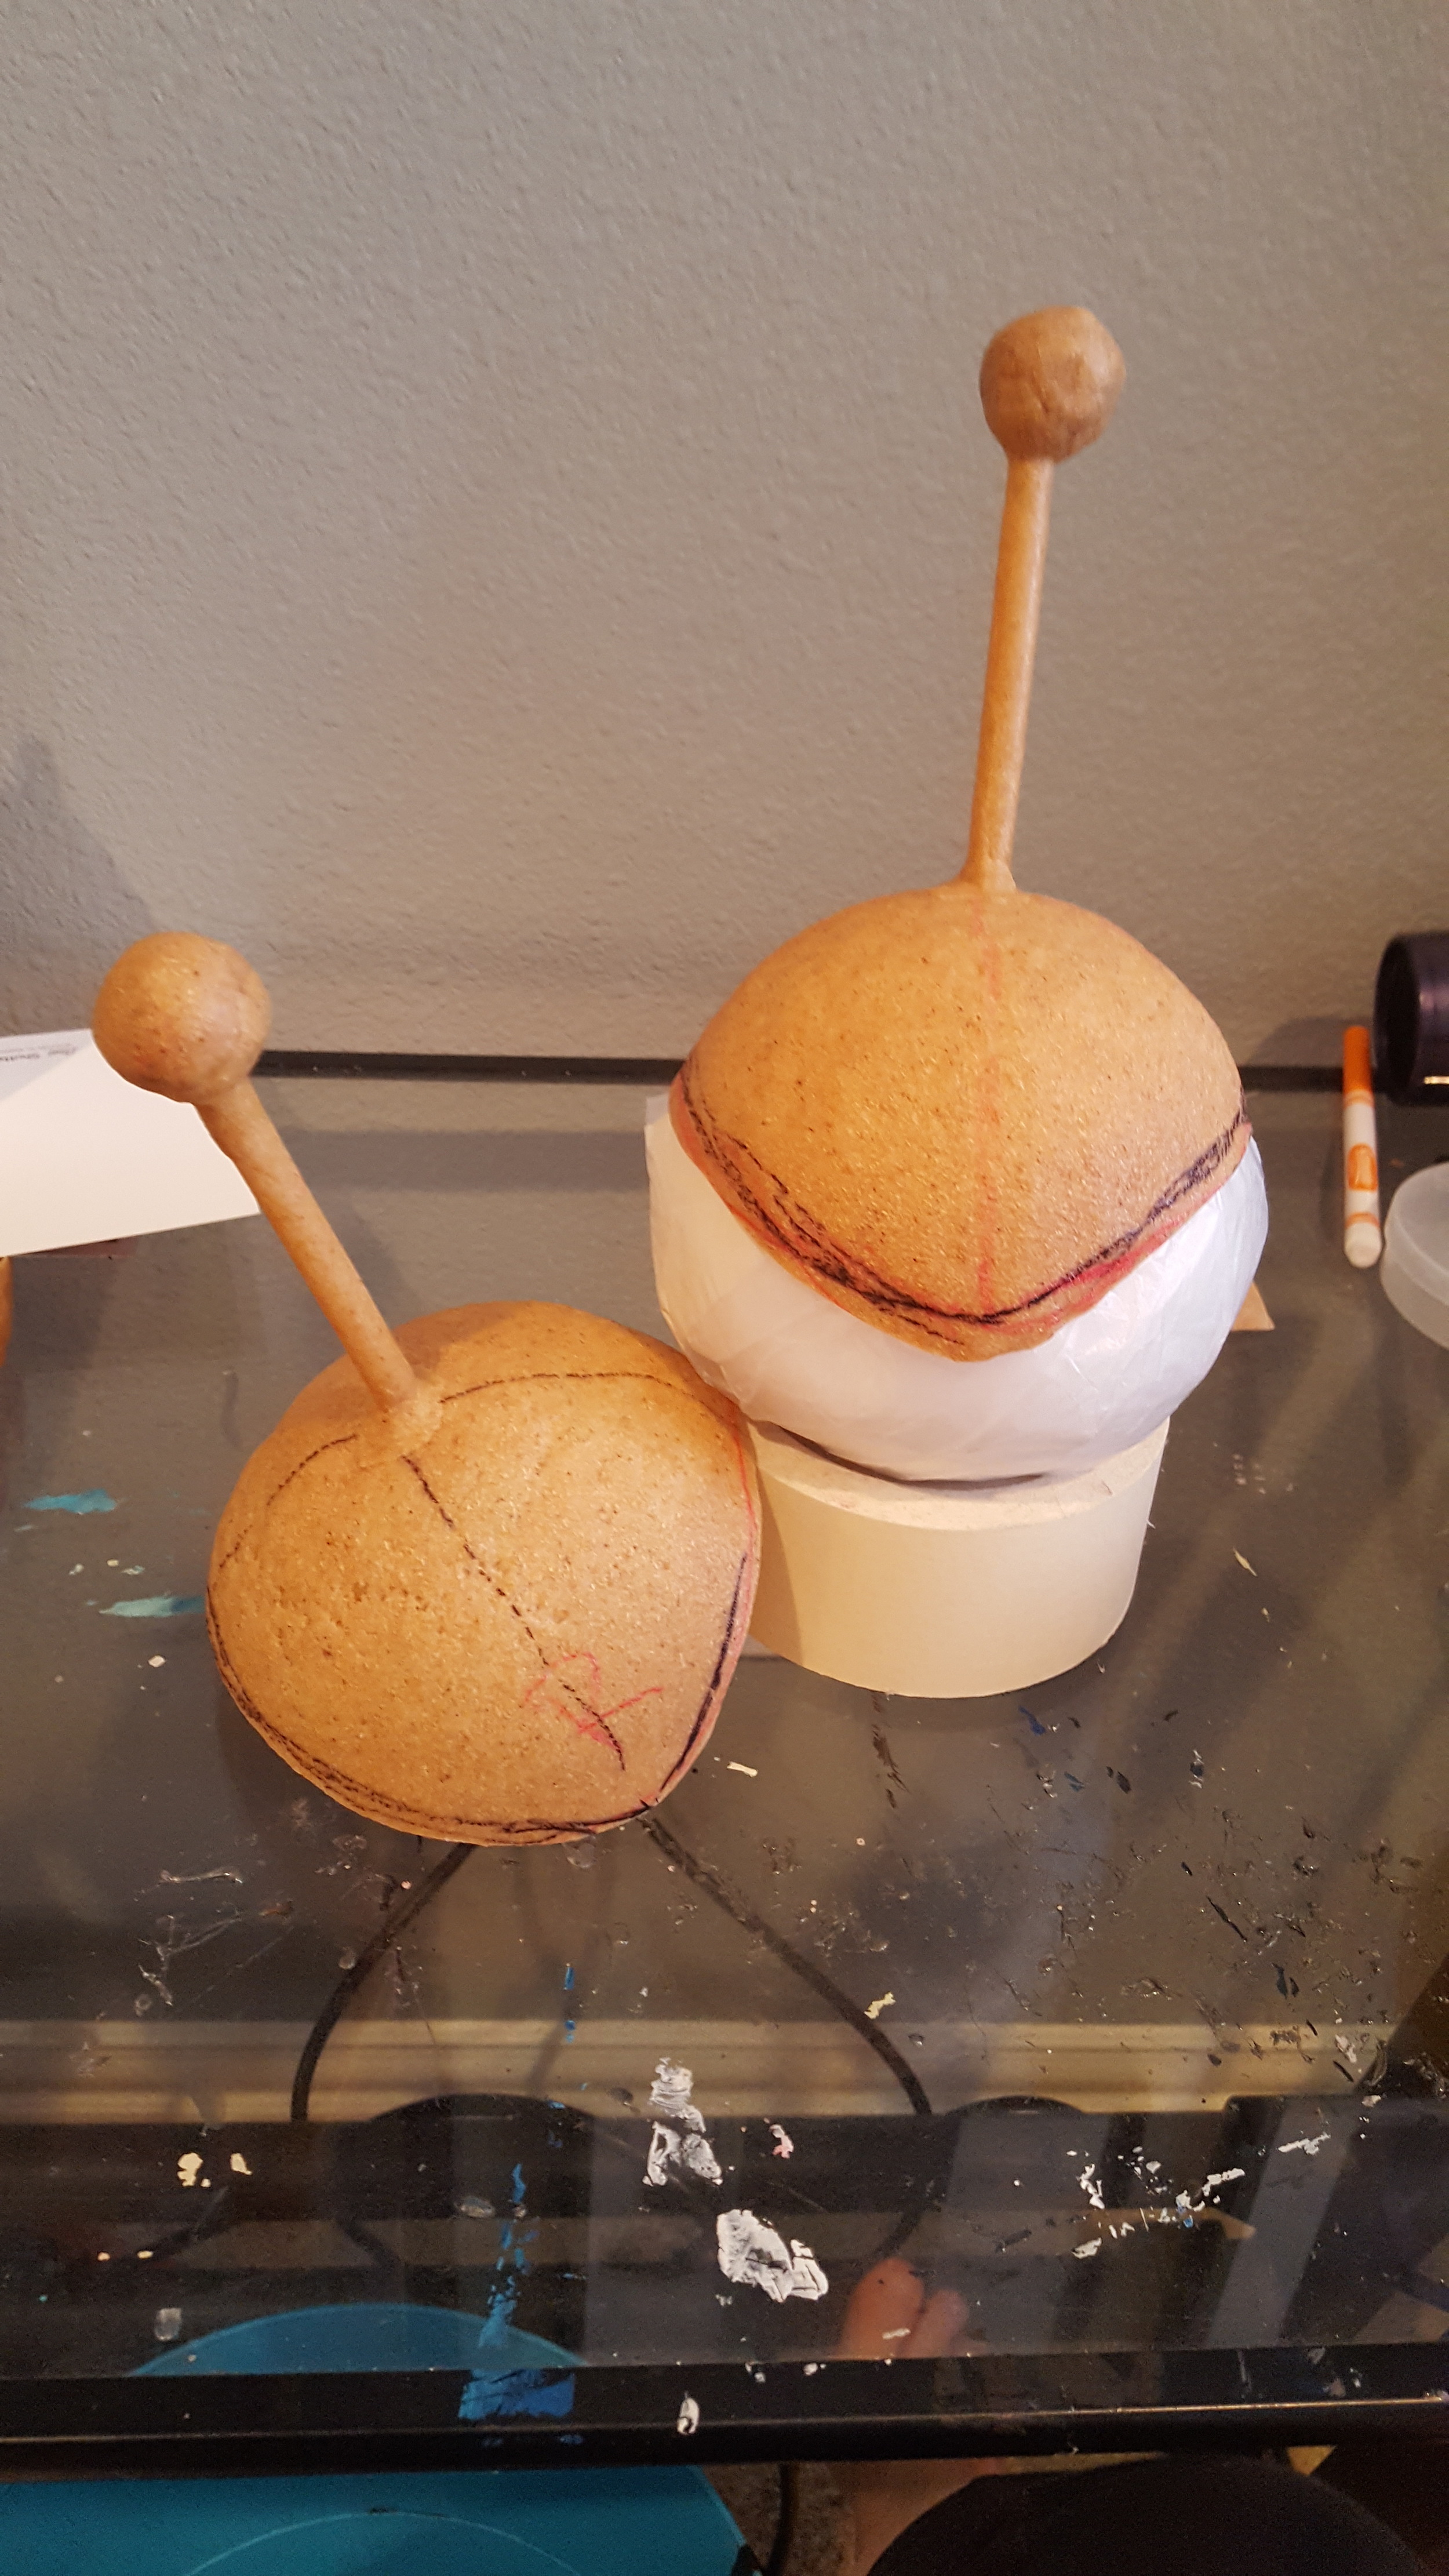
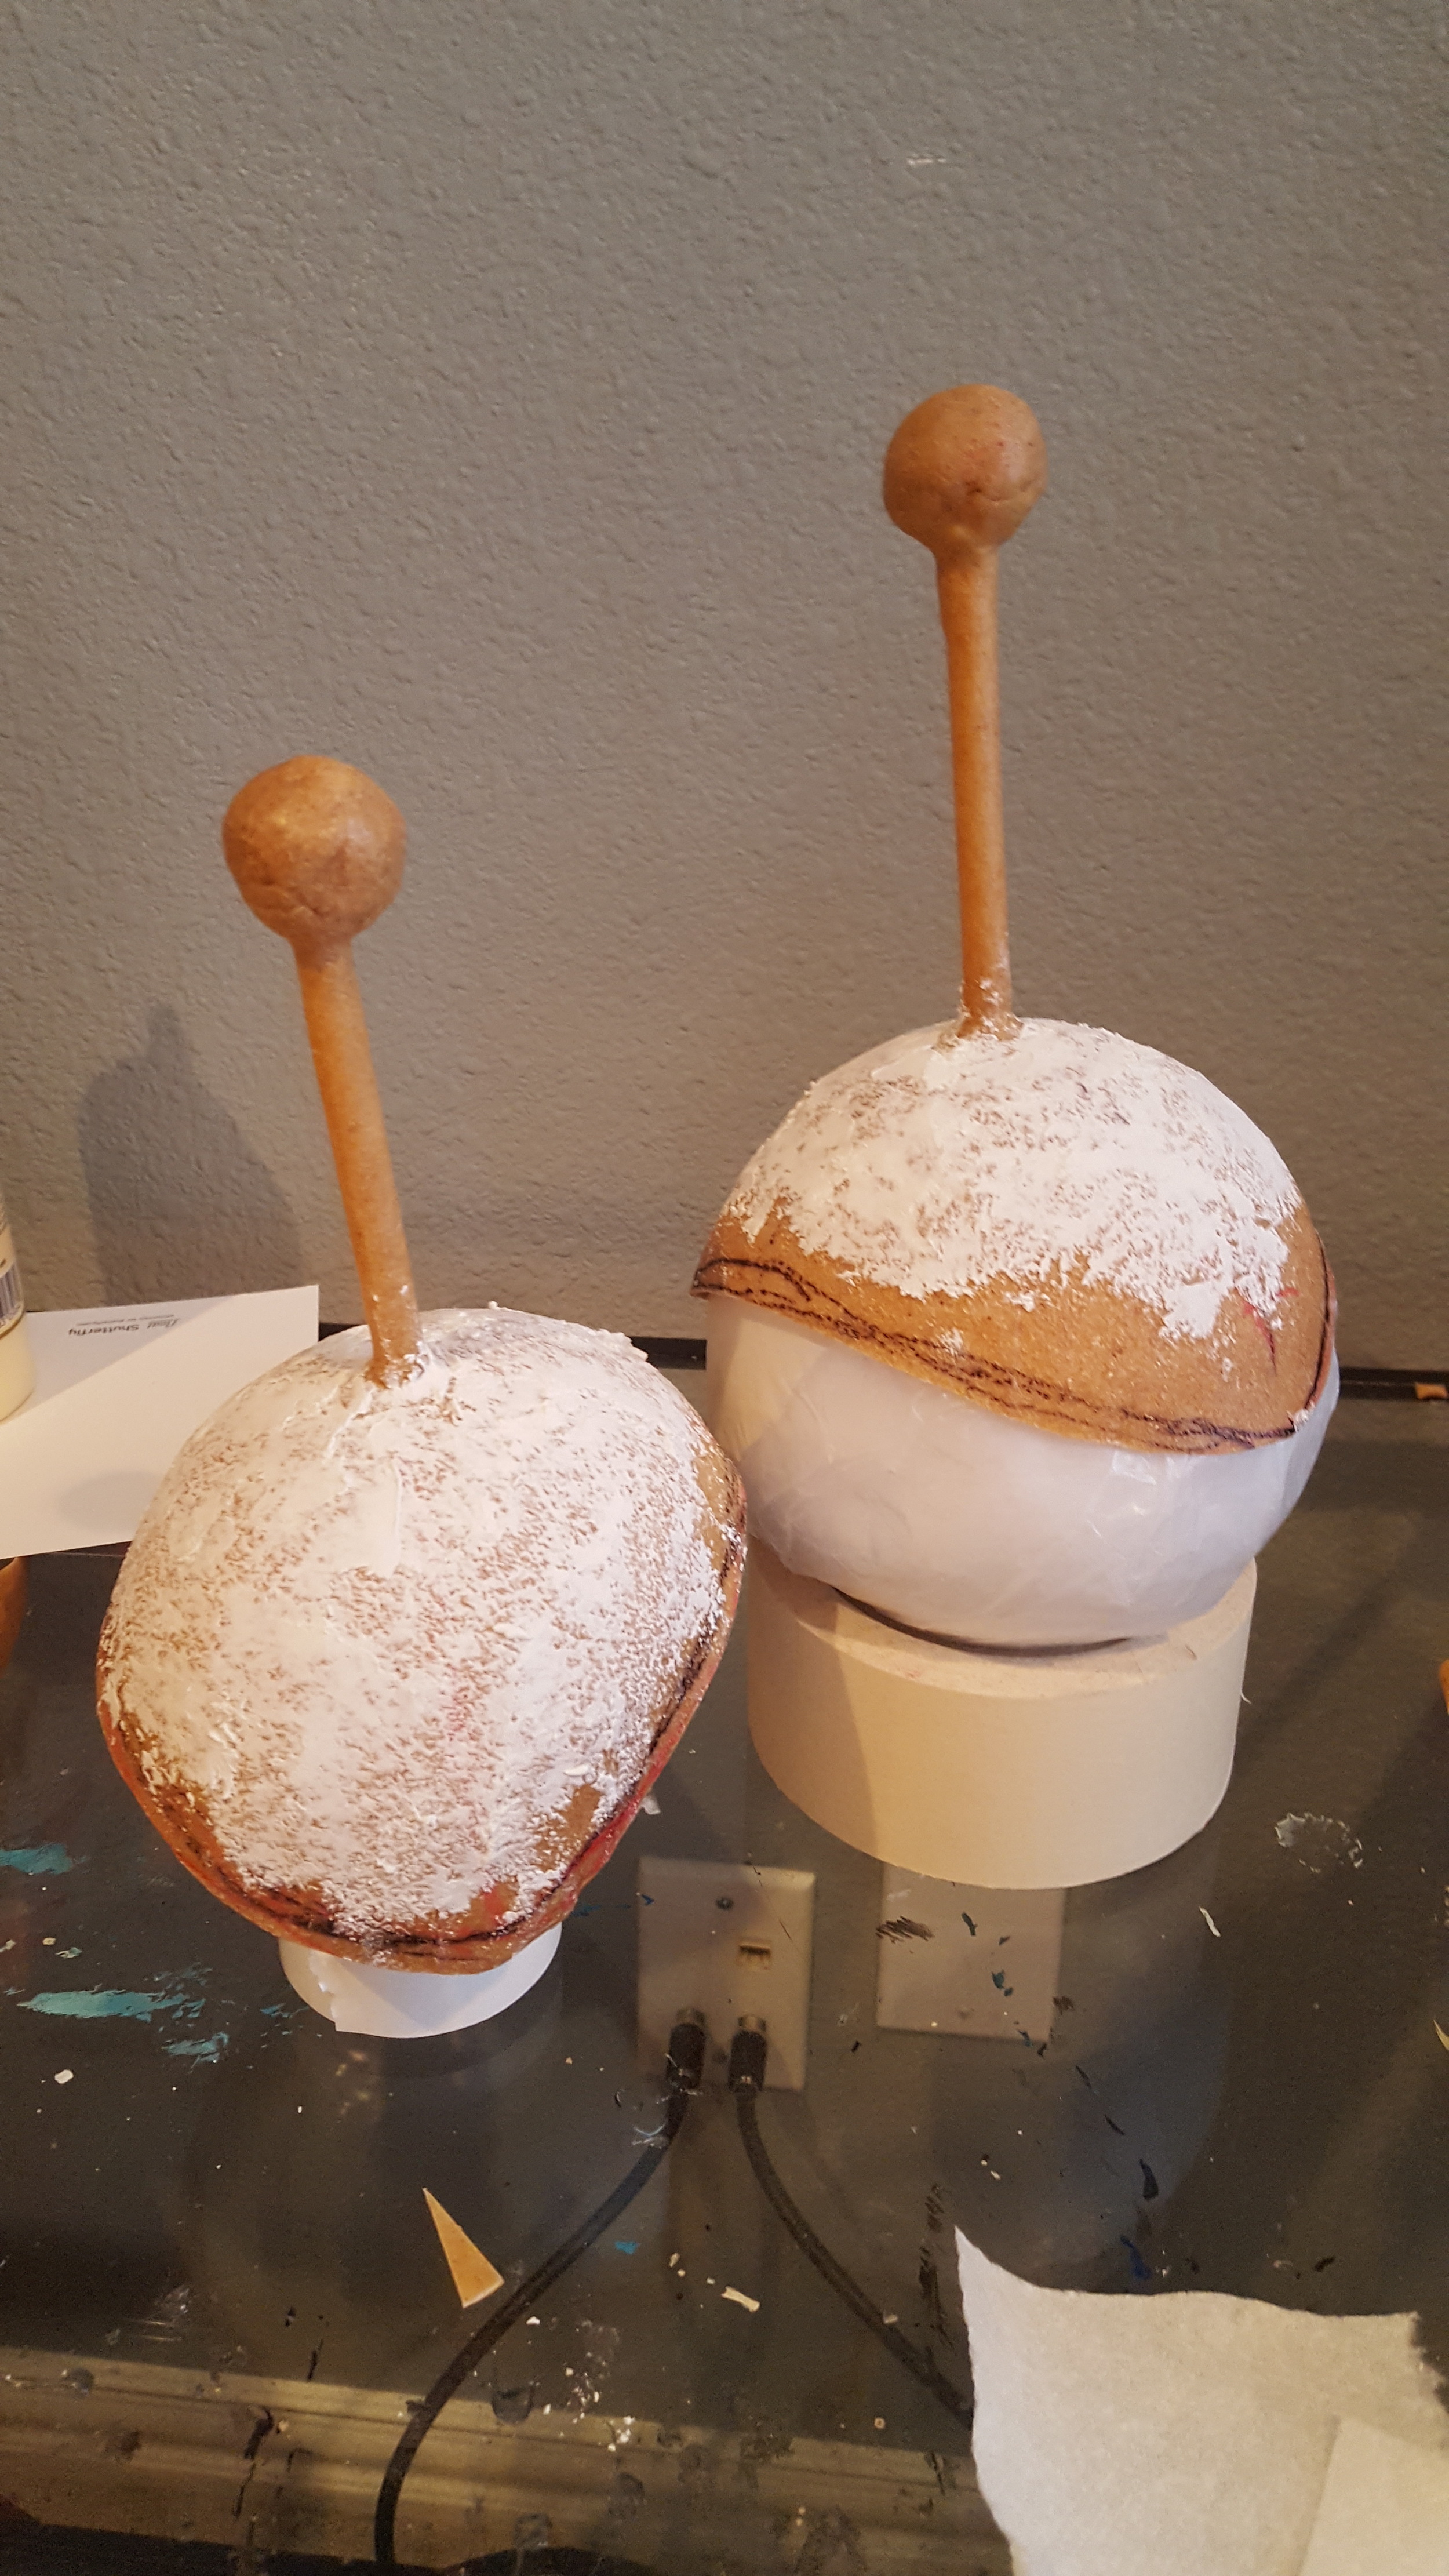
The shoulder pieces were the most difficult part. It took me a few balls, but finally I figured that a 5" styrofoam ball would be big enough for my shoulder. The size is up to you, and you'll want to pick something that is proportional to your body. I layered two pieces of Worbla together and stretched them quite a bit over the ball, to the point where I could see through both layers of Worbla in some parts. Because I didn't want the Worbla to stick to the styrofoam, I covered the ball in wax paper and it worked like a champ! The big antennae were made from a hot glue stick with a ball of foil on top, covered in Worbla. I used spackling putty to fill in the thin bits of Worbla and about six or seven coats of gesso to prime it, although I didn't know how fragile spackling putty was going to be, SO USE BONDO! I prefer using Liquitex brand gesso. I finished everything off with some gold spray paint and spray Shellac, which is my favorite sealant if I don't need something crystal clear!
And that's how I made my Rain Mikamura fight suit! I hope this gave you some ideas and help on similar projects!
